How to Clean Earring Holes: A Safe and Effective Guide

Welcome to your comprehensive guide on how to clean earring holes effectively and safely. As a jewelry expert with years of experience, I understand the importance of maintaining the sparkle of your earrings and the health of your ears.
Unclean earring holes can lead to many problems, including infections and allergic reactions, so it's crucial to adopt a proper cleaning routine.
This article will explore the best practices for keeping your earring holes clean, ensuring they stay healthy and free from complications.
Understanding the Importance of Clean Earring Holes
Cleanliness is next to godliness, especially when it comes to earring hygiene. Your earring holes are susceptible to bacteria and debris buildup, leading to unpleasant and sometimes painful infections.
Regular cleaning prevents these issues, ensuring that your earlobes remain healthy. Moreover, proper hygiene practices can extend the life of your earrings, keeping them shiny and new.
When to Clean Your Earring Holes
Ideally, you should clean your earring holes daily, especially if you wear earrings regularly. It's best to clean them after a shower when your skin is soft and the pores are open, making it easier to remove any buildup.
If you notice any redness, swelling, or discomfort, it's a clear sign that your earring holes need immediate attention.
Preparing to Clean Your Earring Holes
Before you start, gather the necessary materials:
- Saline solution or mild, fragrance-free soap
- Cotton swabs or pads
- Rubbing alcohol (optional for disinfecting earrings)
- A clean towel or cloth
If you're making a saline solution, mix a quarter teaspoon of salt with a cup of warm water until the salt dissolves completely.
Step-by-Step Guide to Cleaning Earring Holes
- Wash Your Hands: Always start by washing your hands with soap and water to avoid introducing new bacteria to your ears.
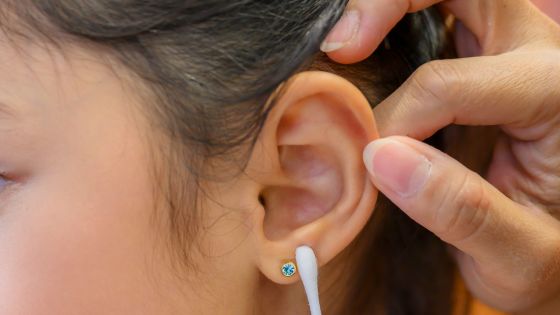
- Apply Cleaning Solution: Dip a cotton swab in the saline solution or mild soap water and gently apply it around the front and back of your earring holes.
- Clean Gently: Rotate the earring gently to ensure the solution reaches inside the hole. Be gentle to avoid irritation.
- Rinse Thoroughly: Use a clean, damp cloth to remove any cleaning solution residue.
- Dry Carefully: Pat the area dry with a clean towel or cloth. Avoid rubbing harshly.
- Disinfect Your Earrings: If you've removed your earrings, clean them with a bit of rubbing alcohol before putting them back in.
Aftercare and Maintenance
After cleaning, it's important to let your ears rest. Leave your earrings out for a few hours to let your earlobes breathe.
For those with newly pierced ears, follow your piercer's aftercare instructions diligently and avoid changing earrings frequently during the healing period.
Common Mistakes to Avoid
- Using Harsh Chemicals: Avoid strong cleaning agents like hydrogen peroxide or harsh soaps, as they irritate the skin.
- Over-Cleaning: Overzealous cleaning can lead to irritation and dryness. Stick to a gentle, daily routine.
- Ignoring Signs of Infection: If you notice persistent redness, swelling, or discharge, consult a healthcare professional.
When to Seek Professional Help
If you experience severe pain, excessive swelling, or signs of an allergic reaction, it's time to seek medical attention.
A healthcare professional can provide appropriate treatment and advice, especially if you suspect an infection.
Conclusion
Keeping your earring holes clean is a simple yet crucial aspect of your daily hygiene routine. Following these steps can prevent infections and keep your ears healthy.
Remember, the key is consistency and gentleness. If you have any tips or experiences about earring care, feel free to comment below. Let's keep our ears happy and healthy!

